7.17.2012
Artist Showcase: The Paper Pulse
I'm here today to introduce to you a very special friend and artist: Debbie from The Paper Pulse. I met Debbie through the Silhouette Plus forum, a great place to make friends and find papercrafting inspiration! Debbie has been a huge source of encouragement and support for me as I've built my little business and I wanted to give a shoutout to her!
Recently, she has made some beautiful papercrafts with some of the files from my Etsy shop and I wanted to share them with you all.
The first card was made using my Whimsy Flowers digital paper and my Hand-Drawn Owls set. She used the .svg files of the owls to cut the layers on her Silhouette. Isn't it darling?
The second project she did was using my Pretty Pretty Princesses clipart set. Again, she used the .svg files and her Silhouette to make a pretty little paper doll! Check out her post with these projects here.
The final project she made was a gorgeous vintage card using my Vintage Spoon styles image. She made her own cut file with the image and turned it into a tag for her card, super creative! Her post about it is here.
Be sure to check out her blog and the Silhouette forum for more fun projects and inspiration!
-Here's to the creative journey
7.12.2012
Art Nouveau Flowers with the Silhouette Cameo
I'm super excited to share a project with you using my new clipart set: Art Nouveau Flowers! This set is a little different because I'm experimenting with including Silhouette cutting files! I have lots of cutting files available in the original clipart section of my shop but I love the idea of being able to print and cut my vintage clipart as well. Let me know if this is something you all would use and I will look into adding the die cutting capabilities with more of my vintage clipart sets.
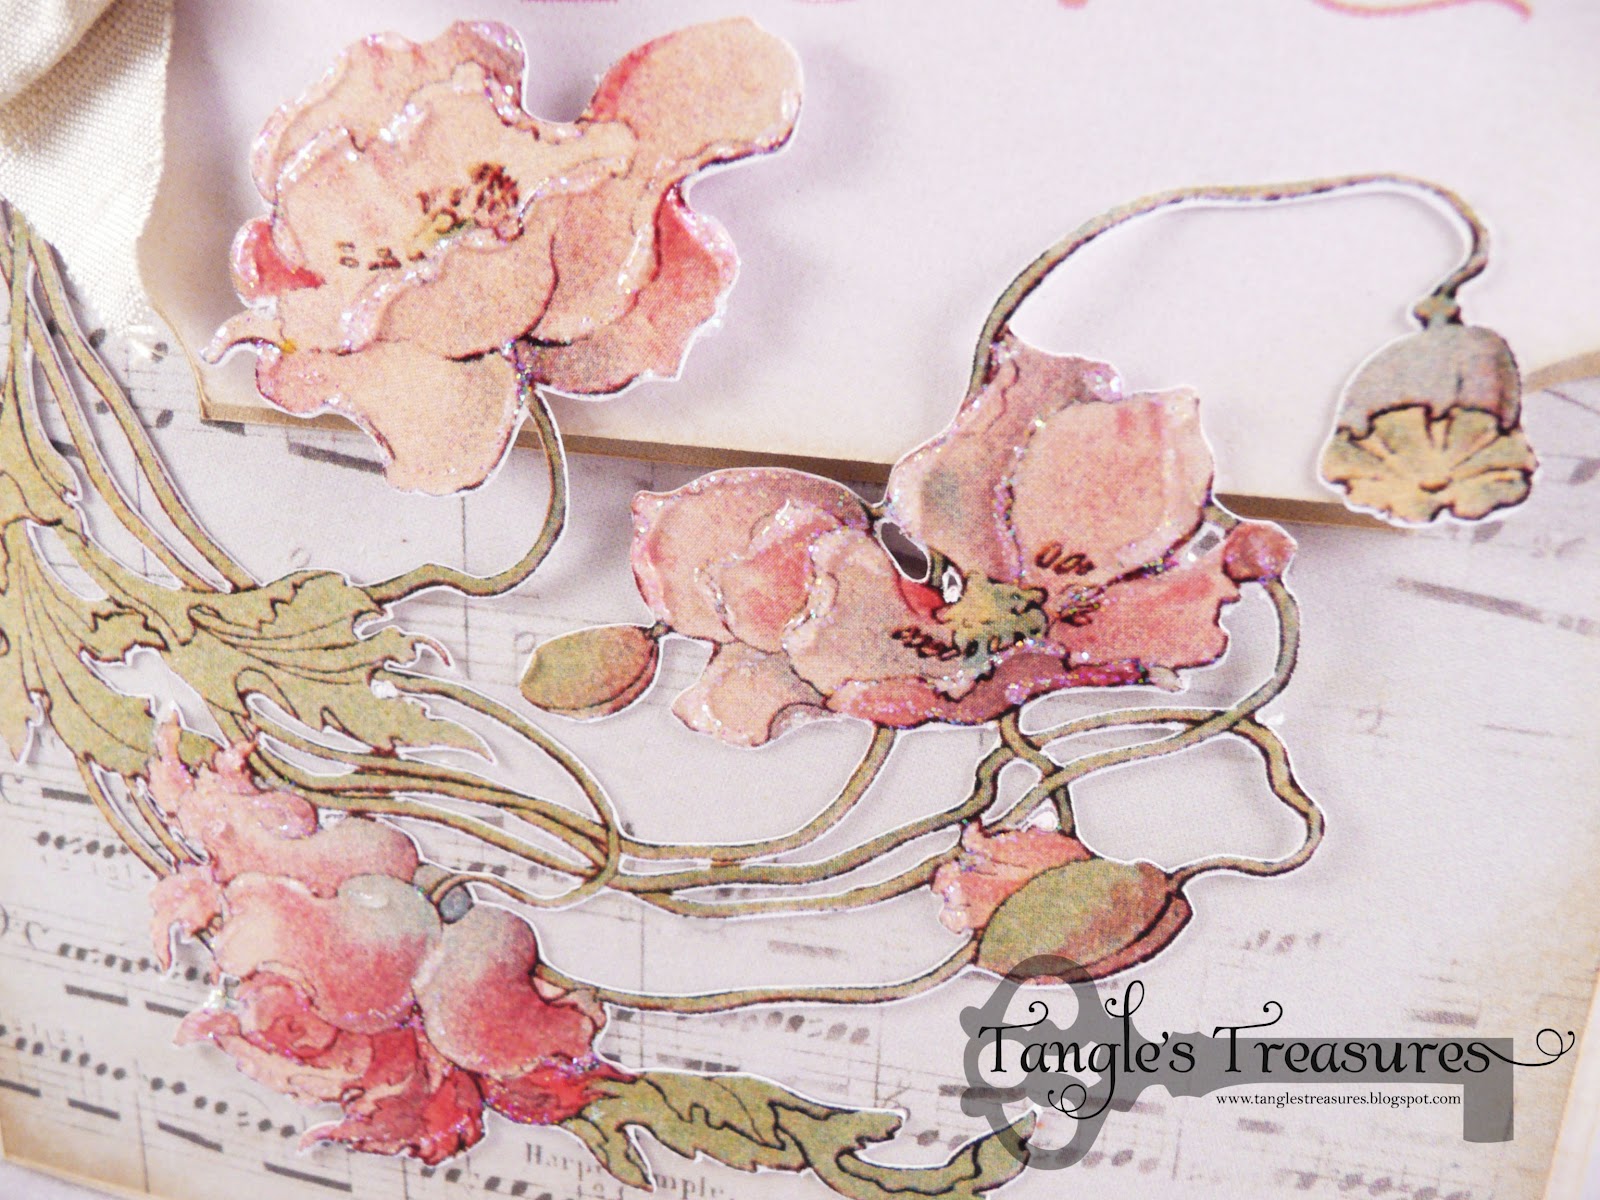
I have take a little moment to rave about the Silhouette Cameo's cutting abilities. Just look at the detail on these cuts! The poppy is only about 4" tall and it cut perfectly....I have to be honest, I wasn't expecting it to turn out this well.
- Patterned paper: "Something Old, Something New" by TanglesTreasures
- Poppy cut: Art Nouveau Flowers1 by TanglesTreasures
- Ribbon: Midori dupioni
- Other: Tim Holtz distress ink: Antique Linen
- Stickles Glitter Glue
6.01.2012
New stuff
I have a TON of new stuff to share with you today along with a fun project so bear with me on this long post. I told my husband I wanted to set a goal to have 50 items in my Etsy shop and I'm almost there! I've added a mix of images for you all to play with. To celebrate my new launch I'm also having a buy two get one free deal so check it out! The link to my Etsy page is to the left : ).
The first category is some clipart sets and photoshop brushes I've made from vintage sources:
I've also added some original clipart including my very first owl set! I'm so happy with how they turned out, I feel like they are pretty different from the options out there.
The last category are my $1 images. These are also from vintage sources and are perfect for printing on fabric, canvas, burlap, printable heat transfer vinyl, wood veneer, or really anything else you can think of. I've been researching projects with these kind of images and I'm totally amazed at the variety.
Lastly, I have a new collection of original clipart that are all Art Nouveau flowers I made based on some vintage watercolors from a book of poetry. These are perfect for wedding or shower invitations, anniversaries, or just wall art.
For my diecutting fans, I'm offering all my original clipart in .svg files so you use them with your Silhouette machines. Just convo me at checkout to request the .svg files instead of .pngs.
Here is a little card I made using the new clip art set of hand drawn owls. The set includes six owls and 3 branches for different seasons. I think this little girl owl is my favorite : ). The patterned papers are from the Echo Park Graceful digital set. I just used the .svg file for the owl and the branch and ungrouped the parts to make layers. Doing this allows you to reposition the owl however you want (ex. wings up, wings down, head cocked to the side or straight, etc.).
Here is a cut made with one of my the new Art Nouveau flower clip art images. Its really straight forward to do a straight up print and cut, doing the layers on this one is a little more complicated because of all the pieces but it only took me about 10 minutes to layer the roses into 4 layers (you can see better in the closeup). If you end up buying this one, just let me know and I will send you the .studio file I used to make this so the layering is done for you : ).
There are tons more new sets and images on My Etsy shop so stop by and let me know what you think! Thank you all for your support!
~Here's to the creative journey!
4.24.2012
Mojo Monday and Meet Woolsey
Today I have some exciting news. I've been waiting to introduce you to someone and he is finally here!
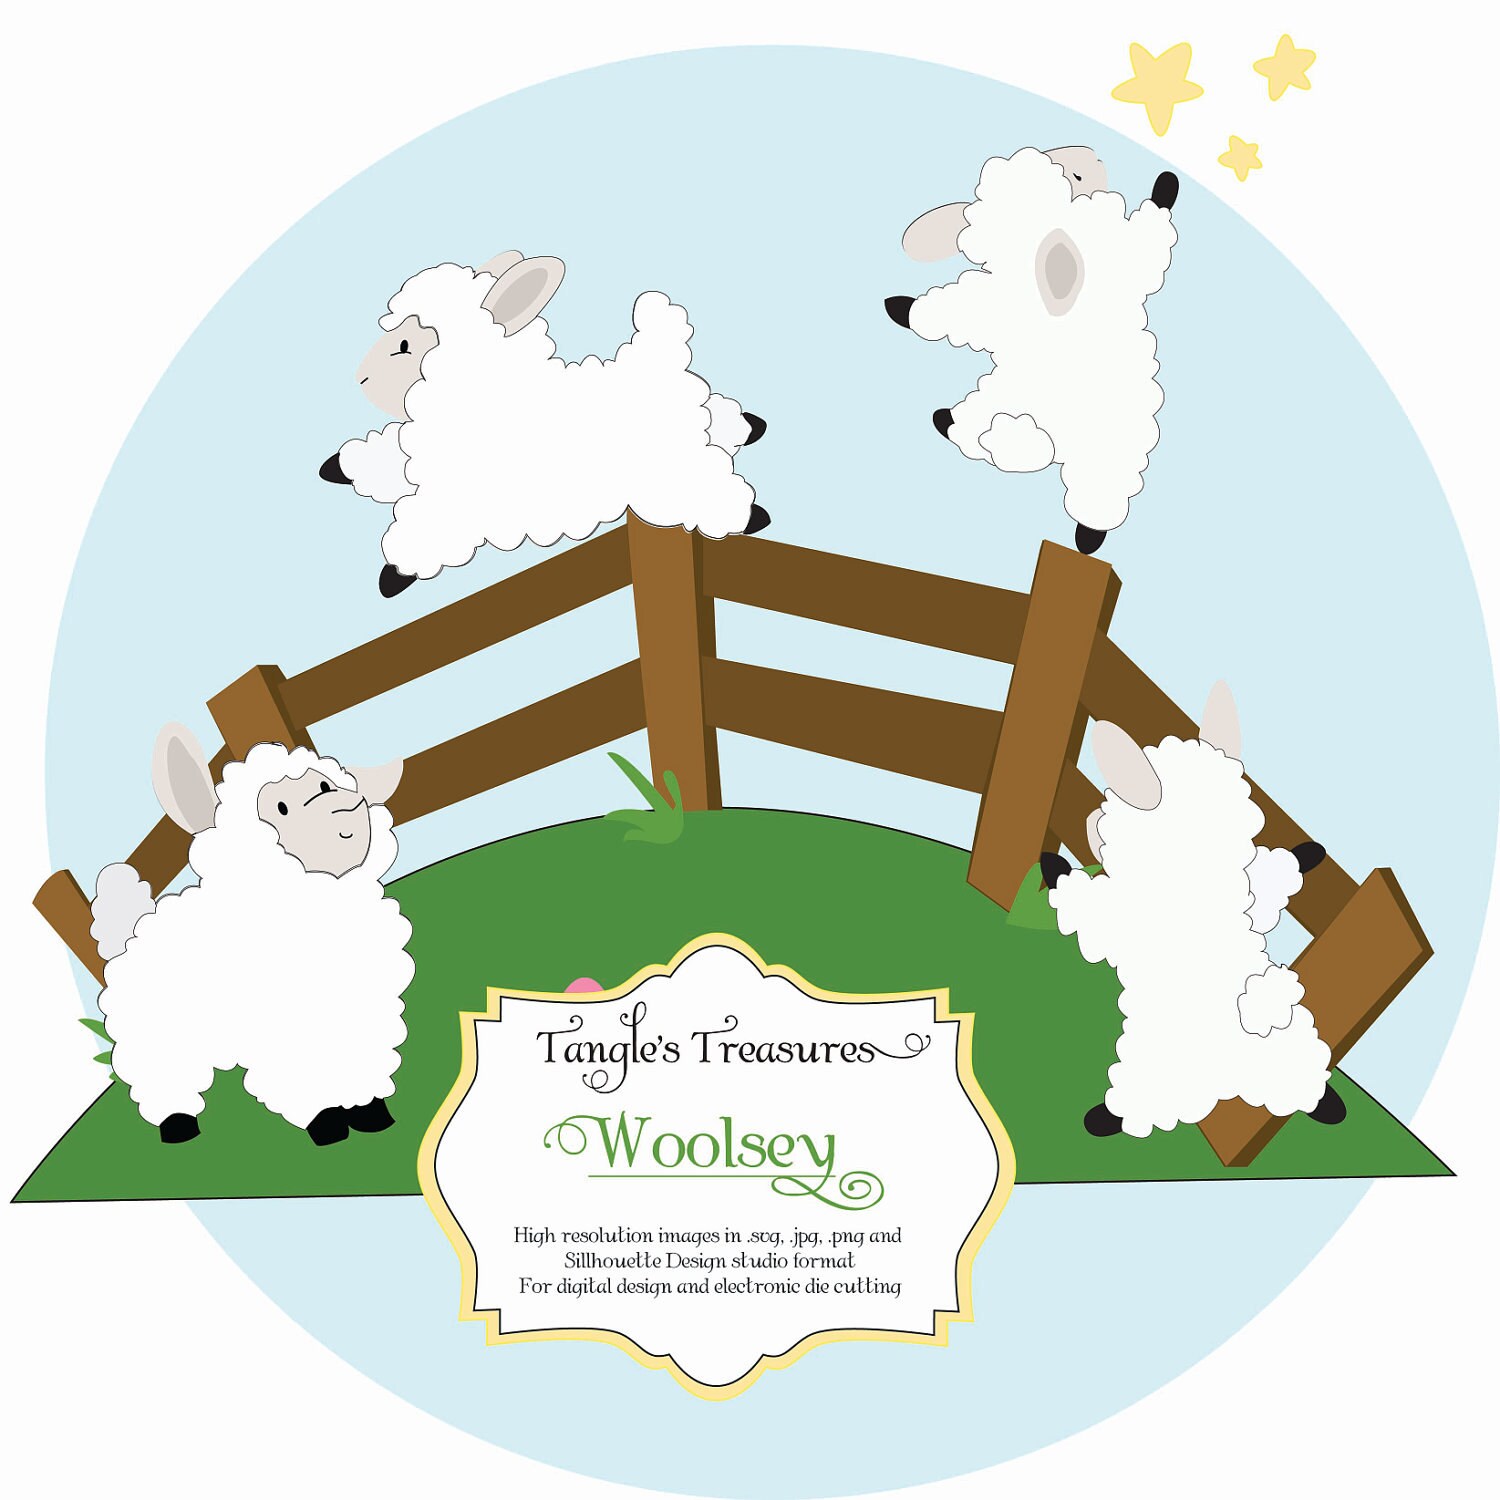
Meet Woolsey!
Woolsey is another friend in the Juniper Woods line of characters. This set includes Woolsey in four fun poses as well as a hill for him to play on and stars for him to dream under. These files are based on artwork by my sister and talented designer, Rachel Land
These files are available on my Etsy shop here and are delivered in .svg, .jpg, .png, and Silhouette Design Studio format
Graphic Design:
Woolsey can be used in digital format either as a complete image or layered for any graphic design or digital scrapbooking project.
Die Cutting:
This is designed to be compatible with most diecutting machines and can be used with Make The Cut and Sure Cuts Alot software. For designers who own a Silhouette die cutting machine, a print and cut file and regular cut file are included in the Silhouette Design Studio format.
I was inspired by this week's Mojo Monday sketch to create this card with Woolsey
Here is the sketch:
and here is my take on it:
I used the image of Woolsey reaching and his stars and used the print and cut file to make him. I added white flocking to him to make him all fuzzy. It turned out even better than I was expecting!
~Here's to the creative Journey
4.01.2012
Meet Bennit
I'm so sorry I haven't been posting as much as I would like, I've been hard at work on some new die cutting shapes and digital papers that will be debuting next week on my new Etsy site!
I also have some super fabulous news: my sister, Rachel Land, who is a talented children's book illustrator has agreed to partner with me to create diecuts of some of her wonderful characters.
As children, we spent hours and hours playing in the little nook under our stairs that we had converted into an imaginary world we called Juniper Wood. Its inhabitants were all woodland creatures with personalities and histories. We had many wild adventures together and we have decided to bring to life some of that world and share it with you and your children. Today, I would like to introduce you to the first character in our Juniper Wood series, Bennit the bunny.
Here is some of Rachel's concept art that I used to create the die cut shapes:


And here is a sneek peek at one of the finished shapes included in the Bennit series:I printed and cut Bennit's layers and added a few shading details with ink (for the edges) and copic markers. The files will include a print and cut and normal cut version of the Silhouette file plus a colored .svg file for those of you who don't have a Silhouette.
The border and flower are new designs of mine and I love how they turned out! I added stickles and flower soft to the flower to make it more detailed : ).
I created this project for the bunny challenge over at Monica's Creative Madness blog. All the shapes and papers here are mine, all printed and cut with my Silhouette Cameo, some of which will be available to you very soon!
Project Ingredients:
- Cardstock: Conqueror
- die cutting machine: Sillhouette
- ribbon: hand dyed hug snug seam binding
- twine: Heidi Swapp (Soiree collection)
- other: flower soft, stickles glitter glue, ink
3.24.2012
I Spy Sketches and sneek peek
Today I have a card based on a new sketch over at I Spy Sketches.
here is the sketch:

And here is my take on it:
I have used some of my new cuts I will be releasing to my new Etsy shop in the next few weeks. The little elephant is from a series called "Ollie and Olivia" which will be available in both .SVG and Silhouette cutting files so you can use it with any of your die cutting programs.I designed her to be fully poseable so you can really change her around however you want!
I grouped together the pieces that I wanted to print as layers, then I printed her on my printer, cut out the pieces with my Silhouette, then inked the edges and applied diamond glaze to her nails and the little star. I glittered the star with some martha Stewart glitter. The background papers are all Echo Park's Country Drive digital line.Ingredients:
- diecuts used: "Ollie and Olivia" by Tangle's Treasures (elephant)
- sentiment: Bell and Annabel Script fonts
- patterned paper: Echo Park Country Drive digi line
- Glitter: Martha stewart
- ribbon: hug snug seam binding
3.21.2012
Mojo Monday #233 and sneek peeks!
I have some super exciting news: after much deliberation, I have decided to open my very own Etsy shop! If you have been following my blog, you know that I love digital designs and I decided I want to share that love with you all! So, I will be designing and selling digital stamps, papers, and SVG and silhouette cutting files so you now will be able to make any of the projects that I post here. Today, my Mojo Monday project includes some sneak peeks of my upcoming product releases : ). Keep an eye out in the next month for special grand opening freebies and coupons for my loyal followers! I'm excited to start this journey with you all!
Here is the sketch that the super talented Mojo Monday designers whipped up:

And here is my take on it:
All the die cuts on this page are my designs: the portrait silhouette, the border, the notched rectangle tag, and the little sentiment tag are all mine! The papers are Victoria Garden by Echo Park.
Ingredients;
- Diecutting machine: Silhouette Cameo
- Diecuts: little tag, border, notched rectangle, Cameo portrait (coming soon to etsy.com/shop/tanglestreasures)
- patterned paper: Victoria Garden digital papers by Echo Park
- ribbon: hug snug seam binding, Tim Holtz distress ink (Fired Brick)
- resin flower: Zacoo.com
3.17.2012
Babapuff and Mojo Monday #2
So I originally had two design ideas for this week's Mojo Monday so I thought I'd share the second one. This carriage image is from Babapuff's Babapuff Baby shop and comes with this princess set: Comment on this post for a chance to win $20 worth of products from one of their two shops!

I uploaded the carriage image to the silhouette design studio and traced parts of it separately and then laid the cut lines over the original image so the Silhouette would cut it out in layers. The polka dotted paper is also from Babapuff.
This little flower and leaves is one of my own designs. I just love how it turned out. I added details with Copic markers and added a little stamen that I bought from Michael's in the bridal section.
I also designed the hill shapes. I'm thinking of opening an Etsy shop to sell some of my Silhouette cut files and digi papers. Maybe design some papers that would coordinate with Cricut Cartridges. What do you think? How many of you use Silhouette or digital papers? I would (of course) offer lots of freebies and discounts to my loyal blog followers. I guess its something to think on...
Ingredients:
- Cardstock: Conqueror
- Diecutting Machine: Silhouette Cameo, Cricut Expression
- Clipart (princess carriage): Babapuff Baby
- patterned paper: polkadot (Babapuff), pink dots (Lori Whitlock)
- Silhouette cuts: Hills, Flower, leaves (my designs : )
- ribbon: Midori Dupioni
- Cricut Cartridges Used: Cricut Craft Room Exclusives: Banners
- Other: Stamen (Michaels), Pearls (Recollections), glitter glue (Stickles), Copic Markers
~Here's to the creative journey
3.14.2012
Babapuff and Mojo Monday
I'm here with a Mojo Monday card and a reminder about this week's giveaway. I actually won Mojo Monday 227 using Babapuff's papers, which is one of the reasons I asked them to join me in this giveaway.
Anyway, here is this week's sketch:

And here is my take on it:
I used the Silhouette Cameo and all digital papers to make this project. All the papers are Babapuff's except the woodgrain. I imported one of their darling digital owls and a tree from the same set into my Silhouette design studio software and traced the shapes using the trace feature before flood filling them again with matching colors picked up with the eyedropper tool. Now when I put the layers back together it looks exactly like the original image, just 3 dimensional!
For my fellow Cricut users, these papers are fabulous to use with your cuts. They can be scaled or changed and then printed in swatches on one piece of paper and cut out. I do it all the time! No more stacks of papers, drawers of leftover pieces, or running out of your favorite print.
I know some of you are thinking that its not worth it because of ink costs but I did the math and I'm spending about 50 cents or less per project. Obviously it would be a little more if you are printing 12x12 papers edge to edge in a dark color but the beauty of digital is that it allows you to coordinate perfectly with papers you already have. Okay, I'm done with my shpiel : ). Enjoy!
Ingredients:
- digital paper (polka dots) and graphics: Babapuff
- ribbon: May Arts
- Cardstock: Conqueror
- Other: Silhouette Cameo
3.12.2012
Babapuff double giveaway!
I have some super exciting news: this week I'm having a DOUBLE GIVEAWAY sponsored by one of my favorite Etsy sellers, Babapuff! They sell digital papers and clipart and you can see some of the projects I've made with their wonderful products, here, here, and here. They have generously donated two $20 gift certificates to their two stores: Babapuff and Babapuff baby. This giveaway will close next Sunday night.
To enter:
- be a follower of my blog
- Leave a comment on any of my posts this week, all of them will be using Babapuff's products. One entry for each comment!
- Put a note on your blog about this giveaway for an additional 2 entries!
Here are some images of their sets:
My first project is using set of beautiful frames directly above. For Silhouette users, this clipart is ideal for tracing in the Silhouette design studio software. If you don't have a Silhouette, this art can be printed and incorporated in nearly every form of project. I will be showing you throughout the week just how versatile it can be : ).
I made a simple project to hang in my front entry way. All I did was add the welcome sentiment using Silhouette studio and cut it out in black vinyl and put it on the glass in my frame. For Cricut users, this image could be printed on acetate and put in the frame as well.
I made the flower using wool felt and millinery netting, cutting the felt with a Spellbinders scalloped circle nestabilities die. These flowers can be used on anything, artwork, hair clips, shoe clips, or pins. i will post a tutorial soon about how to make them : ).
Ingredients:
- Design: Babapuff
- Silhouette Cameo + Silhouette design studio software
- black vinyl: Specialty graphics supply
- frame, felt: Ben Franklin Crafts
- button, millinery netting, white trim: Joann Fabrics
- other: Spellbinders nestabilities scalloped circle die,
~Here's to the Creative journey